Spring Boot 3 - REST API Tutorial
Learn to create REST API using Spring Boot, Spring Data JPA and H2 Database
Table of contents
Introduction
In this tutorial, we are going to create a REST API using Spring Boot and H2 database.
What is an H2 database?
H2 database is a lightweight and fast relational database management system that is written in Java. It can be embedded in Java applications or run as a standalone database server. H2 supports SQL and JDBC API and provides features such as transactions, concurrency control, and stored procedures. It is a popular choice for developers because it is easy to use and can be configured either as an in-memory or file-based database, making it ideal for testing and development environments.
Step 1: Setting up the project
Head over to https://start.spring.io/ and create a project keeping a few things in mind:
Language: Java
Leave the Spring Boot version as default
Choose at least Java 17 because Spring Boot 3 requires at least Java 17
Add the following as dependencies:
Spring Web
Spring Data JPA
H2 Database
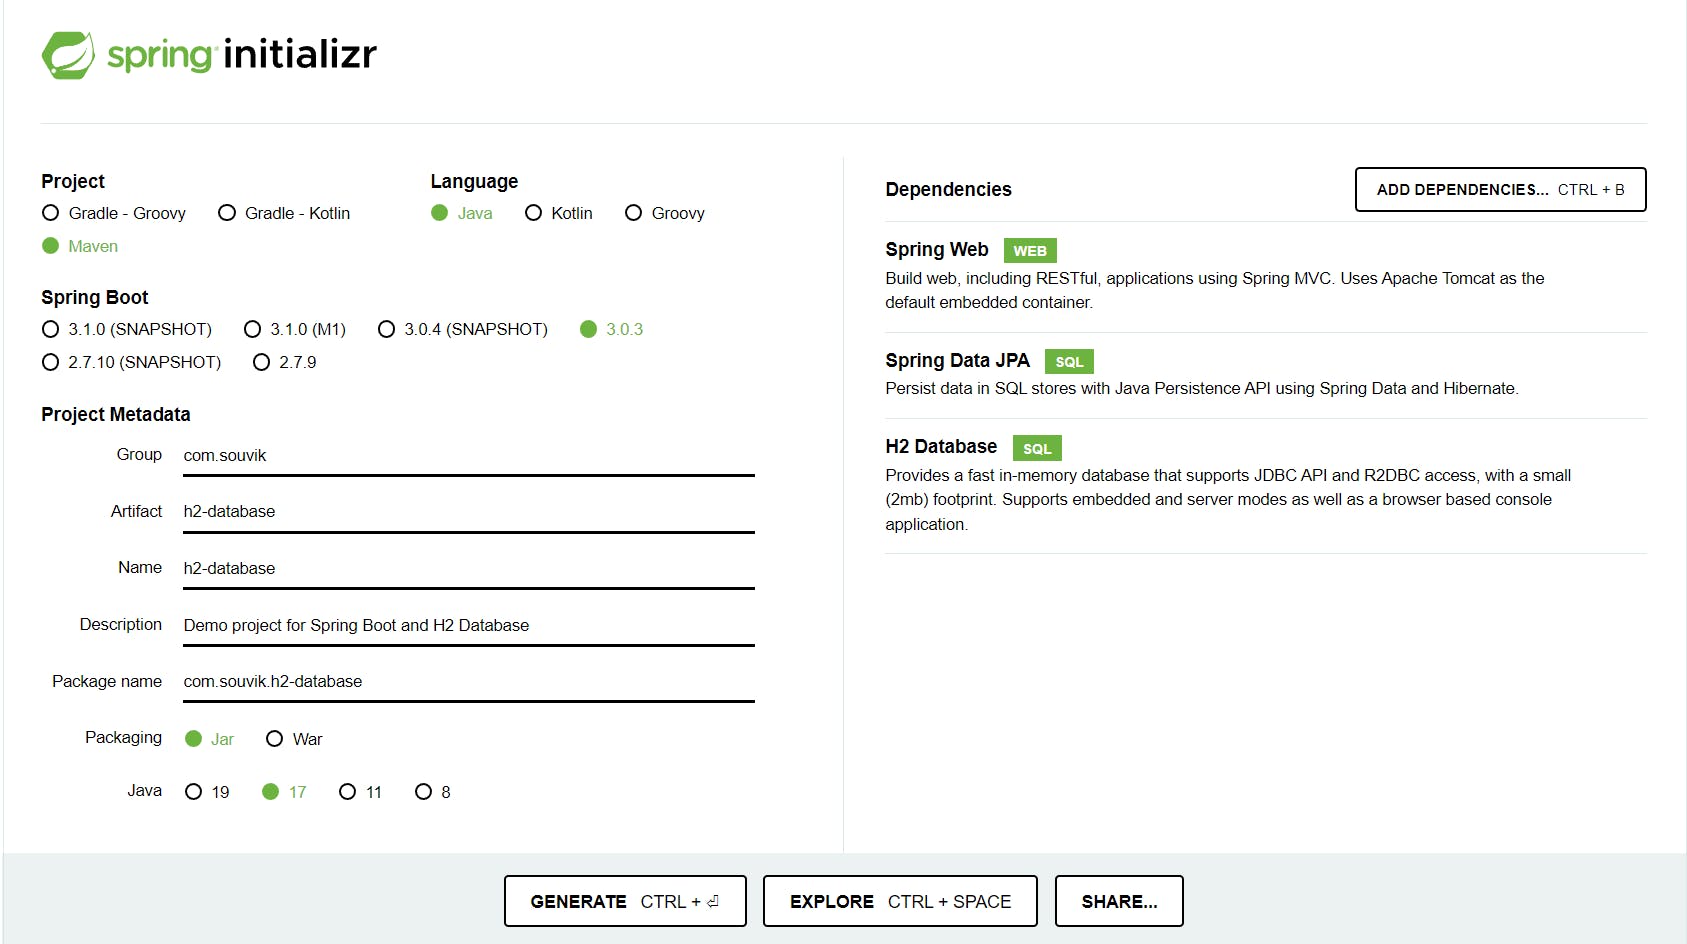
Click on GENERATE. A zip will be downloaded.
Extract the zip and open the project in your IDE of choice.
Step 2: Creating the entity
In Spring Boot, an entity represents a table in a database. An entity class defines the structure and attributes of the table, and each instance of the entity represents a row in the table.
Considering every employee has 3 properties:
id
name
salary
the entity definition is:
package com.souvik.h2database;

import jakarta.persistence.Entity;
import jakarta.persistence.Id;

@Entity
public class Employee {

    @Id
    @GeneratedValue(strategy = GenerationType.IDENTITY)
    private Long id;
    private String name;
    private Double salary;

    // Getters and Setters here...
}
The @Entity annotation indicates that this class is an entity that will be mapped to a database table. The @Table annotation specifies the name of the table. The @Id annotation marks the field as the primary key and the @GeneratedValue annotation specifies that the value of the field will be generated automatically.
Step 3: Creating the repository
Next, we need to create a repository class that will handle database operations. We will use Spring Data JPA for this purpose. Create a new interface called EmployeeRepository and extend the JpaRepository interface. JpaRepository provides all the CRUD functionalities.
package com.souvik.h2database;

import org.springframework.data.jpa.repository.JpaRepository;
import org.springframework.stereotype.Repository;

@Repository
public interface EmployeeRepository extends JpaRepository<Employee, Long> {
}
The @Repository annotation is used to indicate that a class provides data access and persistence functionalities.
Step 4: Creating the service layer
This layer contains all the business logic. It acts as an intermediatory between the controller and the repository. Create a file called EmployeeService and define the functionalities required for our HTTP requests as below:
package com.souvik.h2database;

import org.springframework.beans.factory.annotation.Autowired;
import org.springframework.stereotype.Service;

import java.util.List;
import java.util.Optional;

@Service
public class EmployeeService {

    @Autowired
    private EmployeeRepository employeeRepository;

    public List<Employee> getAllEmployees() {
        return employeeRepository.findAll();
    }

    public Optional<Employee> getEmployee(Long id) {
        return employeeRepository.findById(id);
    }

    public Employee saveEmployee(Employee employee) {
        employeeRepository.save(employee);
        return employee;
    }

    public void deleteEmployee(Long id) {
        employeeRepository.deleteById(id);
    }

}
@Service annotation is used to indicate that a class provides a service layer for the application. It is a specialization of the @Component annotation and is used to mark classes that contain business logic.
Step 5: Creating the controller
In this step, we will create a controller class that will handle HTTP requests and responses. Create a new class called EmployeeController and add the following code:
package com.souvik.h2database;

import org.springframework.beans.factory.annotation.Autowired;
import org.springframework.http.HttpStatus;
import org.springframework.http.ResponseEntity;
import org.springframework.web.bind.annotation.*;

import java.util.List;
import java.util.Optional;

@RestController
public class EmployeeController {

    @Autowired
    private EmployeeService employeeService;

    @GetMapping("/")
    public List<Employee> getAllEmployees() {
        return employeeService.getAllEmployees();
    }

    @GetMapping("/{id}")
    public Optional<Employee> getEmployee(@PathVariable(name = "id") Long id) {
        return employeeService.getEmployee(id);
    }

    @PostMapping("/")
    public ResponseEntity saveEmployee(@RequestBody Employee employee) {
        try {
            employeeService.saveEmployee(employee);
        } catch (Exception e) {
            System.out.println(e);
            return new ResponseEntity(HttpStatus.INTERNAL_SERVER_ERROR);
        }
        return new ResponseEntity("Employee created with id: " + employee.getId(), HttpStatus.OK);
    }

    @PatchMapping("/{id}")
    public ResponseEntity updateEmployee(@PathVariable(name = "id") Long id, @RequestBody Employee updatedData) {
        try {
            Optional<Employee> originalData = employeeService.getEmployee(id);
            if (originalData.isEmpty())
                return new ResponseEntity("Cannot find employee with id: " + id, HttpStatus.BAD_REQUEST);

            updatedData.setId(originalData.get().getId());
            if (updatedData.getName() == null) updatedData.setName(originalData.get().getName());
            if (updatedData.getSalary() == null) updatedData.setSalary(originalData.get().getSalary());

        } catch (Exception e) {
            return new ResponseEntity(HttpStatus.INTERNAL_SERVER_ERROR);
        }
        return new ResponseEntity(updatedData, HttpStatus.OK);
    }

    @DeleteMapping("/{id}")
    public ResponseEntity deleteEmployee(@PathVariable(name = "id") Long id) {
        try {
            Optional<Employee> employee = employeeService.getEmployee(id);
            if (employee.isEmpty())
                return new ResponseEntity("Cannot find employee with id: " + id, HttpStatus.BAD_REQUEST);
            employeeService.deleteEmployee(id);
        } catch (Exception e) {
            return new ResponseEntity(HttpStatus.INTERNAL_SERVER_ERROR);
        }
        return new ResponseEntity("Employee deleted with id: " + id, HttpStatus.OK);
    }

}
Step 6: Configure H2 database
In this step, we will write some properties in our application.properties file to establish a connection between the H2 database and Spring Boot.
spring.datasource.url=jdbc:h2:mem:ems
spring.datasource.driverClassName=org.h2.Driver
spring.datasource.username=sa
spring.datasource.password=
spring.jpa.database-platform=org.hibernate.dialect.H2Dialect
The explanation of the above properties:
Datasource URL: provides a way of identifying the database. Here
Driver Class: It is unique to every database and provides a standard way to access data using Java
Username & password: Used to authenticate the user who is trying to access the DB
Dialect: It provides a mapping between the Java language types and database types. It helps in generating appropriate queries of a particular type of database.
Extra: Initialize Data
This is not mandatory, but some initial data is always good to start with. We will create a file named data.sql in resources folder. Here we will define our SQL queries to insert some data into the H2 database.
INSERT INTO employee (id, name, salary) VALUES (1, 'John Doe', 3500.0);
INSERT INTO employee (id, name, salary) VALUES (2, 'Tim Kirk', 4000.0);
INSERT INTO employee (id, name, salary) VALUES (3, 'Frank Clark', 3000.0);
Now, there are 3 ways in which schema can be created and data can be read:
Automatically: This involves creating the entity and Hibernate automatically creates the schema for us. This will not real any additional SQL file for creating schemas or initializing data.
Manually: Here, we add this property to our application.properties file:
spring.jpa.hibernate.ddl-auto=none. This property will ensure that script-based initialization is performed i.e. Schema will be created using the definition inresources/schema.sqland data will be initialized fromresources/data.sql.Hybrid: Here, we define this property in application.properties:
spring.jpa.defer-datasource-initialization=true. This will ensure that after hibernate creates a schema, additionallyschema.sqlanddata.sqlwill be read(if present).
The terms Automatic, Manual and Hybrid are not official terms. I used them to define each case uniquely.
So, our use case falls under the 3rd category, so we will define the following property in application.properties:
spring.jpa.defer-datasource-initialization=true
Testing Endpoints
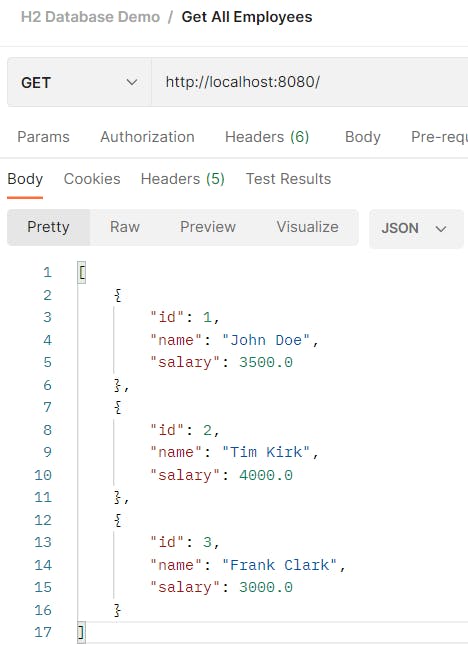
Now, that our application is ready, let's run it and test the endpoints:
Get All Employees
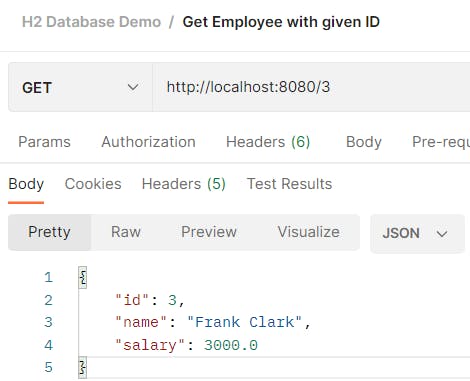
Get Employee with given ID
Save New Employee Data
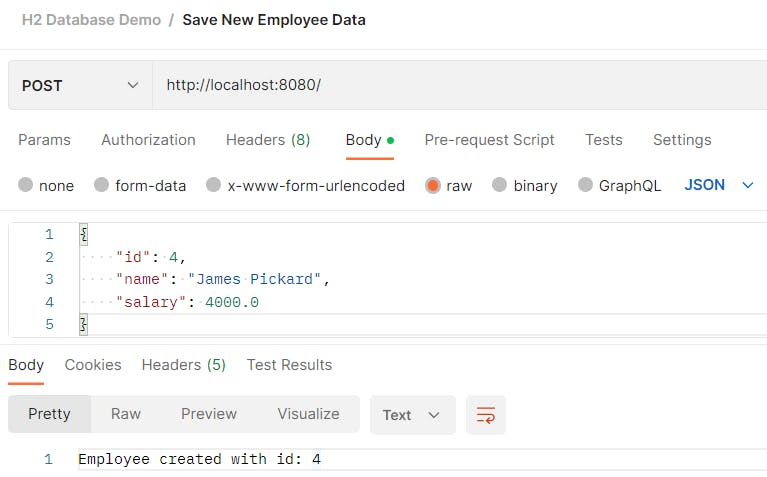
Update Employee Data
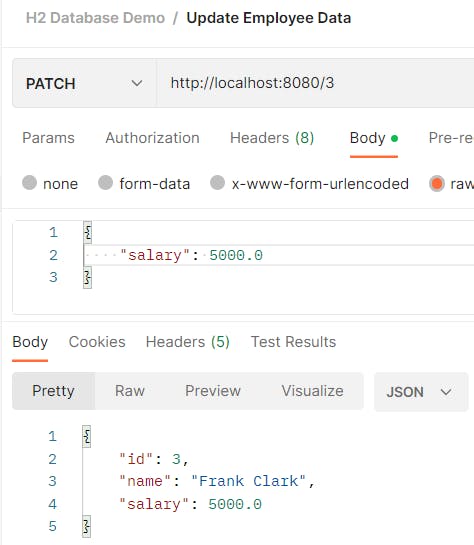
Delete Employee
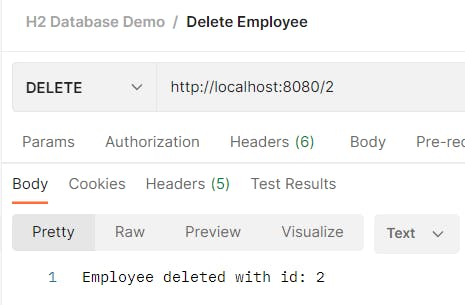
All the endpoints have been tested using Postman.
Viewing The H2 Console
H2 provides an interactive console just like MySQL workbench where you can execute SQL queries directly. To access the console, we need to add the following property in our application.properties: spring.h2.console.enabled=true
Restart the application again and visit http://localhost:8080/h2-console in your browser. A window will appear like this.
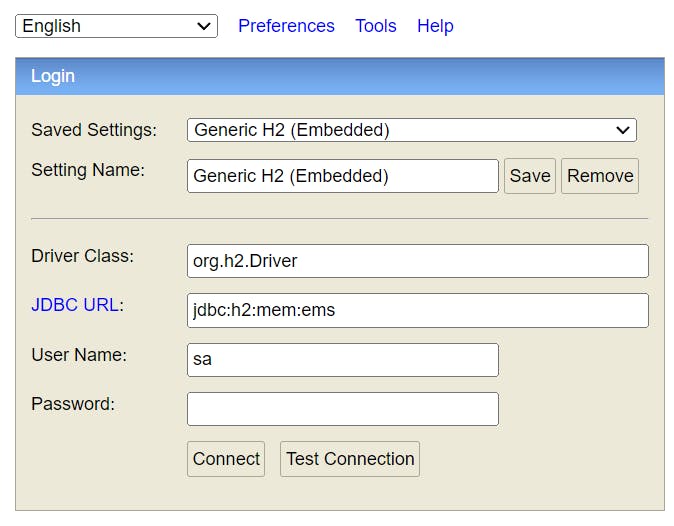
To access the console, perform the following steps now:
Update JDBC URL, User Name and Password with the details given in your application.properties.
Click on Test Connection. A green confirmation should appear like this.
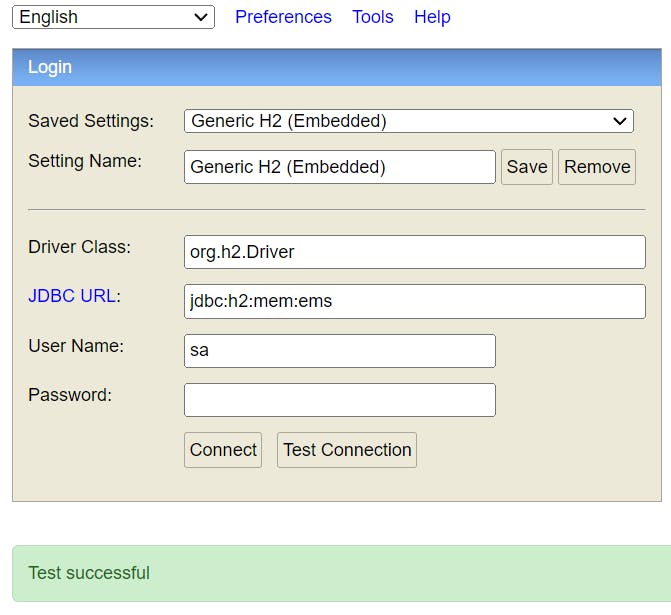
Click on Connect and the H2 console will be displayed.
Summary
So, in this tutorial, we learnt to:
Create a REST API using Spring Boot.
Configure Spring Application to automatically or manually or take a hybrid approach to create the schema using Hibernate.
Configure the H2 database.
